School playground design is not the task of fitting as much equipment as possible into an empty space. It is the process of turning a school’s users, activities, timetable, and site conditions into a layout that works throughout the day.
Start with the people and the site. Decide which activities belong together, draw the routes between them, and check access and visibility. Equipment, surfacing, shade, seating, planting, and drainage should then fit into that plan.
This guide explains that sequence and shows how one MooTon school project used zoning to support different kinds of activity.
Plan the School Playground Design Brief and Site Layout
Define who will use the playground
Record the student age groups, range of abilities, peak number of users, and whether recess happens in one wave or several. Add any class activities, after-school programs, community use, and maintenance routines that affect the space.
Turn broad goals into actions that can be drawn. “Support social play” may require small gathering places outside the main circulation route. “Offer more physical challenge” may call for activities at different heights and speeds. “Support outdoor learning” needs a place where a class can gather without closing the rest of the playground.
Ask staff and students where crowding, waiting, conflict, or underused space already occurs. Their observations help reveal daily patterns, but the final design still needs to balance access, supervision, maintenance, and site limits.
Draw the site conditions before drawing equipment
A useful base plan should show accurate boundaries, dimensions, entrances, building doors, levels, slopes, utilities, existing trees, drainage points, neighboring uses, and features that will remain.
Also record sun exposure, prevailing weather, wet areas, noise-sensitive edges, emergency access, and maintenance access. A retained tree, for example, can affect shade, visibility, grading, and equipment placement at the same time.
| Design input | Decision it affects | What to show on the plan |
|---|---|---|
| Student ages and abilities | Activity range and level of challenge | Intended users for each zone |
| Recess schedule and group size | Zone capacity and circulation | Entrances, gathering areas, and main routes |
| Slope and drainage | Grading, surfaces, and equipment position | Levels, low points, and water direction |
| Existing trees and buildings | Shade, visibility, and usable space | Retained features and their influence areas |
| Maintenance and emergency access | Service routes and clearances | Gates, access routes, and storage points |
The U.S. Consumer Product Safety Commission handbook lists access, age separation, activity conflicts, sightlines, sun, drainage, and surfacing among the issues to consider. How they are handled will depend on the site and local requirements.
Create School Playground Zones by Activity, Age, and Ability
Choose activities before choosing products
List the experiences the playground should support before naming equipment. A school may need a mix of active movement, climbing and balance, imaginative play, social gathering, quiet retreat, flexible games, sensory activity, nature contact, and outdoor learning.
Not every activity needs a separate zone. A small site can combine compatible uses at different times. A larger site may benefit from clearer separation between fast, noisy activity and quiet or class-led use.
Decide what should connect and what should separate
Zone planning is mainly about relationships. Activities that share users or support one another should be easy to move between. Activities with conflicting speeds, noise levels, or space needs require a clear boundary or buffer.
| Zone | Useful nearby relationship | Conflict to avoid |
|---|---|---|
| Active climbing and movement | Open play and waiting space | Quiet retreat directly beside a busy exit |
| Imaginative and social play | Seating and flexible activity | Main circulation cutting through the group |
| Quiet or sensory space | Visible social areas | Isolation behind structures or planting |
| Ball or wheeled activity | Direct access and clear edges | Crossing pedestrian routes |
| Outdoor learning | Shade, seating, and storage | Dependence on closing the whole playground |
The CPSC handbook recommends separating active and quiet activities and spreading popular uses across the playground instead of creating one crowded center.
Design age and inclusion into every zone
Age affects the scale and arrangement of play, but a school should plan from its actual students rather than a generic label. Show where groups will use the site, where they may mix, and how they move between shared and distinct activities.
Accessible circulation should connect meaningful play choices, not end at one separate item. In U.S. projects where federal accessibility rules apply, the U.S. Access Board guidance explains how accessible routes connect play components and why accessible ground-level activities should be spread through the play area rather than grouped in one corner.
Inclusion also involves choice, challenge, social connection, and comfort. The Everyone Can Play principles from New South Wales offer useful questions for checking those qualities. In other locations, they are ideas to learn from rather than local rules.
If the playground is for younger children, MooTon’s preschool projects and equipment offer examples created for early-years settings.
Plan Clear Routes, Accessible Connections, and Supervision
Map how people actually move
Draw routes from classroom doors and site entrances to popular activities, restrooms, drinking points, seating, and the next lesson. Include likely shortcuts, queues, waiting groups, and transitions between fast and slow areas.
Main circulation should not pass through swing movement, slide exits, ball play, or equipment use zones. Accessible routes should connect the same important areas without forcing one group to take a remote or inconvenient path.
Test sightlines from realistic positions
Mark where staff are likely to stand during different recess periods. Check what they can see behind structures, across level changes, near dense planting, and at busy transitions.
Boundaries can guide movement without hiding activity. A change in surface, low planting, seating edge, path, or open buffer may separate zones while keeping the site visually connected. Review every edge from both directions: a feature that organizes one area may create a blind spot from another.
Fit Playground Equipment and Site Systems Into the Layout
Reserve the full space each item needs
An equipment symbol is not its full spatial demand. Each item needs its footprint, access points, and applicable use zone. The exact area and permitted overlaps depend on the equipment, configuration, current requirements, and manufacturer information.
Draw those areas before approving a position. Check whether moving equipment reaches into a path, a slide exit faces a queue, or users returning to an entrance cross another activity.
Once the zones and space requirements are clear, teams can compare MooTon’s outdoor, indoor, and water-play equipment. Schools planning an outdoor space can look directly at its outdoor playground equipment.
Coordinate surfacing, shade, drainage, and support spaces
Surfacing affects access, levels, use zones, drainage, installation, and maintenance. Show where materials change and how water leaves the area. Check how maintenance staff will reach high-wear locations without crossing active play.
Add shade, seating, planting, storage, and service access to the same plan. Put seating where people can pause without narrowing a route. Use planting to shape space without creating hidden corners. Keep storage and service routes close to the areas they support.
School Playground Design Example: Nouf International School
What the project includes
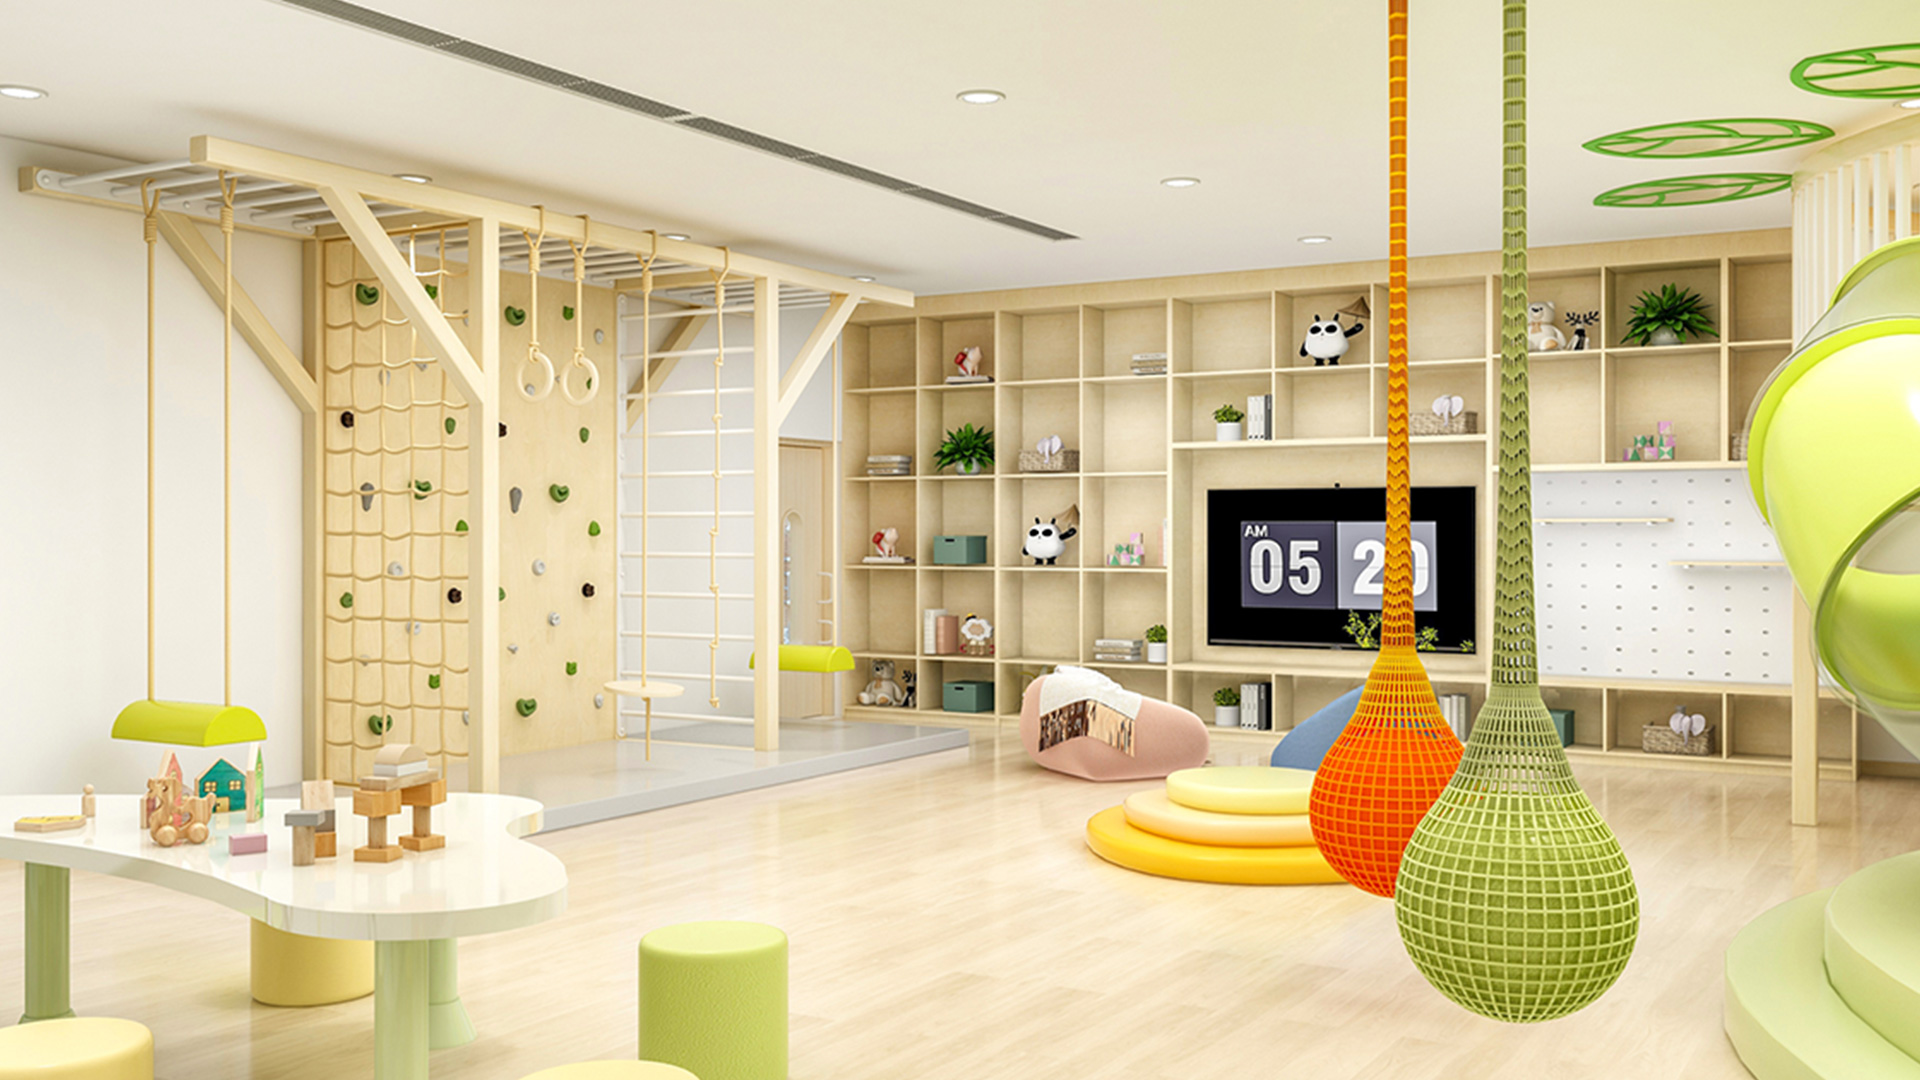
MooTon’s Nouf International School project is an indoor playground in Riyadh, Saudi Arabia. It covers 1,100 square feet and was designed for children aged 0–6.
The design uses two main play spaces. One brings together active and hands-on choices, including a magnetic wall, STEM wall game, climbing wall, wooden house with ball pool, trampoline, and role-play kitchen. The other is more open and supports quiet reading, group interaction, and parties.
What the case shows about zoning
The useful lesson is not the equipment list. It is the decision to give different activity types distinct but related places within a limited area. Active movement and hands-on play occupy one part of the plan, while quieter and more flexible use has its own space.
That same principle can be adapted to a larger outdoor school playground: define the activities first, group compatible uses, protect quieter space, and then choose equipment that fits each zone. The photos and layout details from Nouf International School show how this worked in the finished indoor space.
Test the Plan and Prepare the School Playground Concept
Run the layout through a real school day
Test the same plan under several conditions: a crowded recess, a smaller class activity, mixed-age use, arrival or dismissal, and a maintenance visit.
For each scenario, ask:
- Does a main route cross an activity or equipment use zone?
- Do queues block an entrance, path, or equipment exit?
- Can staff see important transitions from realistic positions?
- Can students reach varied activities without taking a separate or inconvenient route?
If one point fails repeatedly, revise the layout instead of expecting a sign or operating rule to solve a spatial problem.
Put the agreed design on one clear plan
The drawing should show:
- site boundaries, entrances, levels, and fixed features;
- activity and age zones, routes, crossings, and gathering points;
- accessible connections and likely supervision positions;
- equipment footprints, access points, and use zones;
- surfacing, shade, seating, planting, storage, and drainage;
- maintenance access and space reserved for future phases.
This early plan does not replace the drawings needed for construction. Depending on the project, the next stage may include a measured survey, drainage design, engineering, equipment details, accessibility and code checks, approvals, and construction drawings.
If you want to discuss a school playground with MooTon, share the school type, student ages, site plan or dimensions, indoor or outdoor setting, design goals, location, and schedule. You can send those project details to MooTon to start the conversation.
A useful school playground brief begins with a tested layout, not an equipment wish list.